It was a combination of these events that resulted in the latest dress. First, I've been really taken with all the off the shoulder styles that are around at the moment; I particularly liked the tutorial that By Hand London put together showing you how to draft your own.
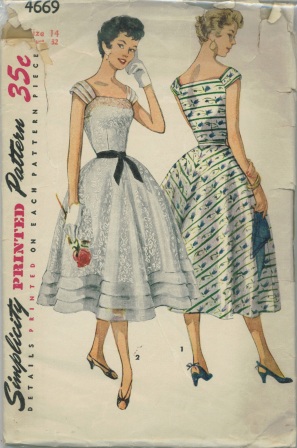
Next, I've always wanted to make this pattern from my collection:
 |
| Simplicty 4669 from 1954 (image from Vintage Patterns Wiki) |
I had an idea that since the straps on this bodice seem to sit on the edge of the shoulder, this would somehow work well with a ruffle or frill.
And finally, I had a big piece of this polka dot fabric in my stash:
I think I got it from Ikea many moons ago; I don't remember how much it cost, but it can't have been much!
I decided to make view 1, with the body in plain black, and with the neckline frill and some extra hem frills in the polka dot. I bought some cheap-as-chips black twill from Walthamstow market and started working on the bodice.
But as I was working on the bodice, I went off the idea of a full skirt. I often feel a bit swamped in a full skirt; I think pencil or just slightly flared suit me.
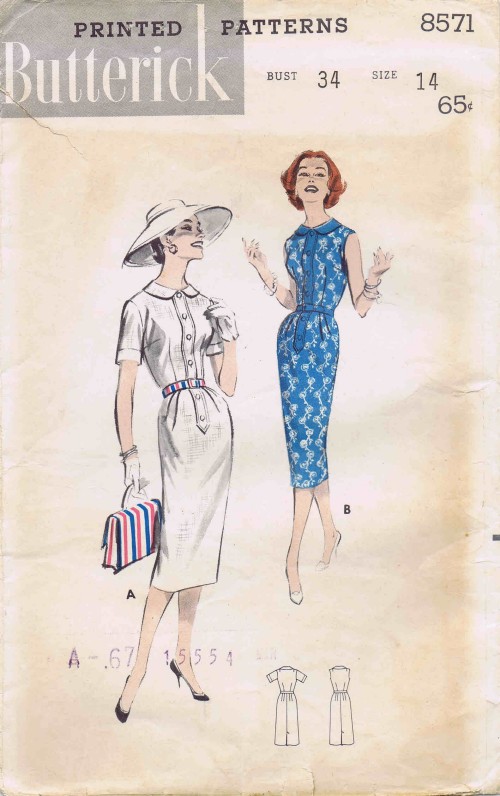
Out came what is starting to become my old stand by, Butterick 8571:
I've used this skirt here, here, and here - I find it just works for me. But I wanted to tie it in with the frill. At first I was going to add another polka dot frill at the hem - but no, just too much. I decided to draft some pockets with flaps at the hip to tie it all together:
 |
| Everybody loves pockets, right? |
 |
| Close up of the left hand pocket, with the hand picked zip |
Excuse the rubbish bathroom selfie, but the dress is actually quite nice in this plain version - maybe a future project?:
But now the frill! The obvious course to take would be to cut a rectangle that was the required depth (plus hems), and was the measurement of the neckline and shoulders times 1 1/2. That method is fine, but I find that can make for a rather boxy frill. Instead I cut the frill as a circular piece, then gathered it to drape across the neckline and around the shoulders:
 |
| Completed frill |
This way the frill has a flare at the hem without too much bulk at the top. It seemed I was pretty much making it up as it went along with this dress, so I decided to do something similar at the hem:
This time the inner measurement of the frill was the exact measurement of the hem, without any gathering.
So here it is all together:
Here are some details:
I gathered the frill with a long machine stitch, then tried it on with the dress to adjust the size. The off the shoulder section had a piece of elastic applied with a 3-step zig-zag to keep it in place:
 |
| Elastic applied with 3-step zig-zag |
I didn't line the bodice - I get really hot! - but I did line the skirt in this rose pink polyester, as well as the hem frill:
Despite having no need for this dress in my wardrobe, I did find a reason to wear it at a friends birthday party. Of course, I forgot to take any photos of it in action!
That's it for now - see you soon!


