Monday 30 March 2015

Cats with Mustard - Mmmm!

Today you get a 2-for-1 post! I know blog posts have been a bit slow from Needles HQ recently, but it's not for lack of any production, just life getting in the way. Anyway, today I present to you the Disdainful Cats skirt with a hand knitted 1960's tie-neck sweater:


Let's start with the skirt - it's basically the same design as the one I used for my December Minerva project, which involved taking a piece from Burda 122 and sticking it on to the back of a self drafted pencil skirt:

Apologies for creasing...


Close up of back frill
The fabric is a medium weight cotton I picked up at Fancy Silks in Birmingham while on the SewBrum meet-up. It actually came from the furnishing fabrics department - I suppose it's intended for curtains, cushion covers, etc. The cats have a bit of a snooty air about them, so I couldn't imagine having a room decked out in them. Imagine all that judgement gazing down at you. But I liked the colour and feel of the fabric enough to ignore their bullying and make this skirt.


Here's some details-

As with the previous version, I avoided side seams by overlapping the front and back pieces at the side and cutting it all as one, with just a centre back seam. As if by some miracle, the pattern matched up nearly perfectly at the back seam:


Almost perfect matching - take that cats! 

I put in a hand picked zip, and finished off the waistband with a little black button from my stash:


The skirt is fully lined, with the hem finished with bias made from the lining:


Lining where the frill meets the skirt

Detail of the hem
Mr needles was kind enough to be my photographer for the day, but as we started to take the photos an unexpected storm started to build up:


It started raining about 30 mins after this photo was taken!
But it gave me an opportunity to get some action shots of the frill:


Now the sweater-

I love knitting, but I'm less experienced with it as compared to sewing, and I'm often less than pleased with the results. So I stick to socks and scarves, and little things that don't require much fitting. 

But this pattern, from a 1960's 'Woman and Home' booklet caught my eye as something I could actually do well:


I used a 4ply wool and polyester mix by Drops, which I ordered from Loveknitting (It's only £1.50 per ball!) And even though I consider it an 'ugly' colour, I chose mustard because it seemed era-appropriate and I secretly really like it. The only drawback is that the wool is a little itchy, but after washing it seems to be softening up.


The whole jumper is knitted in plain stocking stitch, and other than shaping and a little bit of detail at the hems it was pretty boring to knit. 


Here it is:


I think it's pretty close to the original!


Some details:


Close up of hem
The hem of the body and the sleeves all have this picot stitch worked about 11 rows after casting on. After it's worked, you fold the hem under, resulting in this pretty edging.


Inside view of the hem turned up
Here's a close up of the neck tie:


It's just a long strip with pointed ends that's sewn around the neck and threaded through a little knitted loop on the left.


And that's pretty much it - see you soon!
Thursday 12 March 2015

Minerva Bloggers Network - Trousers - 1, Waistcoat - 0

As you've probably worked out from the title, for this month's Minerva Blogger Network Project, I had some success and some failure. I decided on a waistcoat and trouser outfit, inspired by this photo of David Bowie, circa 1976:


David Bowie during his Thin White Duke phase, 1976
I started with the trousers, which were copied from an old pair I already had. I purchased these Claudie Pierlot trousers over 10 years ago, and rediscovered them recently when I was having a big wardrobe clearout:


It's hard to see details in the photos (so hard to photograph black!), but they're flat fronted, mid rise, wide legged trousers with a curved waistband. There are pockets in the side seams, as well as one on the left back. There are also little details like this overlapped waistband closure:


The trousers themselves are a bit worn out, with the fabric a bit shiny in places. They're also a bit tight around my backside. So unlike my previous Libertine coat copy, I had no qualms with picking these trousers apart and using them as my pattern, which you'll see below:


The unpicked trousers - from top: pocket pieces, left and right waistband,trousers front and back

This bit was relatively easy - I just added 5/8"/1.5 cm to each seam as well as an extra 1/4"/5 mm to the centre back, then cut the pieces out. I copied the dart from the back onto my new pieces, and stuck with the 2 1/2" hem from the original. I used a cotton sateen with 3% spandex from Minerva which was just perfect for the occasion - it irons well and doesn't fray too much.

These trousers were a great learning experience for me because it's the first time I've used an overlocker to finish seams on a tailored garment, as you can see below:


It all felt a bit upside down to me - I had to overlock many of the pieces before constructing the garment, and so had to re-think the order in which I would normally work. But on the whole I'm happy with the way it worked out. And I'm actually starting to really enjoy using the overlocker; the straight stitch machine feels so slow in comparison!

Here's the finished product:


I changed the original welt pocket on the back to a false pocket flap:


And without focusing on my bottom for too long, I think the combination of the stretch fabric and the extra seam allowance on the back seam has resulted in a pretty good fit!


And I love the width of the leg, as well as the side seam pockets:


Side seam pockets
One thing I added that's not in the original pair of trousers was a half lining to the back pieces. I always think this helps prolong the life of the garment, and prevent bagging in the seat area.


Inside view of the half lining
So where's the waistcoat? Well, that was a total fail. Instead of resembling the Thin White Duke, I looked more like this:


Wendy Jans, professional snooker player
Incidentally, if you Google 'female snooker players' you get a stupid amount of shots of women leaning over snooker tables showing acres of cleavage. This was virtually the only one where the subject was covered up.

I used this pattern, graded up to my measurements:


McCall's 9722, circa 1954
I thought this was the right amount of tailoring, but with enough feminine fit not to look too 'Annie Hall'. But I messed around with the fit for days, and eventually gave up. This is the only picture I took:


As you can see, it's not fitted enough through the bust and waist. The back piece and the arms/shoulders are fine, but I just got bored with it. I've redrafted the pattern, and I think I have just enough fabric left to make another one, so watch this space. I will not let it defeat me!

See you soon!

Tuesday 3 March 2015

A Bit of Winter Sparkle

Hello there! I'm behind with my blogging and have several things to show you guys, so expect a flurry of posts in the next few weeks. To start - I made a coat! As usual there's a bit of a story behind it. I bought this coat about 10 years ago:


It's by a brand called Libertine, who at the time specialised in customizing high end vintage clothes with graphics. It was hugely expensive, but I managed to get a massive discount, and proceeded to wear it to death as it was SO WARM!!!! There were no labels inside - naughty Libertiner-s took them out and replaced them with their own - but I assume it was a cashmere or cashmere mix. It's also hard to determine the era of the coat without the labels; looking at the construction techniques, it could be from any era between the late 60's to the 80's. 

The coat appears simple, but there is some interesting sleeve. armhole, and yoke construction:


Back armhole and sleeve detail
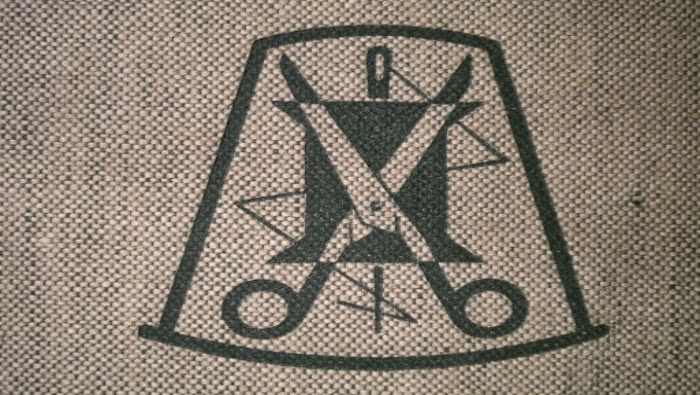
Besides the name on the back, there's also some symbols on the sleeve cuffs:


But as you can probably see in the photos, the coat has seen better days - it's threadbare all over the place, some of the buttonholes are frayed, and I won't show you the lining because it's disgracefully worn out. But I've hung on to it for years because it was an investment and I can't bear to part with it, even though it's pretty unwearable. So I've kept it's memory going by remaking it. Here's the pattern which I made through a combination of measuring and tracing - it looks weird:


The pattern - that's the sleeve on the top right

I was considering taking the coat apart and using the pieces as my pattern, but I just couldn't bring myself to do it - am I the only one sentimental about clothes this way?

I used a sparkly wool that I picked up last summer on a flying visit to Abakhan's in Manchester:


It has a sort of boucle texture with random bits of silver sprinkled throughout. And it frays like crazy when you work with it, so pinking shears were used for most seams. 

And here it is:


I have been wearing this constantly since I made it - it's so warm and comfortable! I didn't quite manage to transfer all of the fullness of the original to my version, but I think it still retains the shape of the original. I lost the front button band - never liked that bit - and added that to the front section. I also made it a good 5 "/12.5 cm approx off the length.


I totally forgot to take any construction photos as I went along, but I used iron-on hair canvas for the interfacing on the front, yoke, and collar. Because I'm a bit 'belt and braces' in general, I trimmed away the seam allowances of all the interfacing pieces to reduce bulk in the seams, and then herringbone stitched the interfacing to the coat pieces. I also placed 3" bias strips in the hem for weight and 'crispness'. Then I turned up the coat hem, and herringbone stitched it to the interfacing before inserting the lining. 

The coat goes together pretty quickly - it's just a series of rectangles, no tricky round sleeves, etc. The only tricky bit is the junction of the sleeve seams under the arm. It took a couple of goes, but I got there in the end!:


Hard to see, but this is what the seams look like under the arms
I was considering interlining the coat for warmth, but then decided it didn't need it. Instead, I used a heavy-ish satin that I found in  local shop in Dalston for a bargain £3 per metre. I don't think it's meant for lining (it seems to have some stretch in it) but I don't care because I like it!


I cut the lining using the same pattern pieces, but with the facings and collar accounted for. It was put together on the machine, but then applied to the coat by hand:


Where the lining meets the coat - you can see my little hand stitches


Where the lining meets the centre back facing, with a pleat for ease of movement.
I topstitched around the centre front collar and yoke, just like the original. I also avoided button holes by using big black press studs:


Top stitching and press stud detail


I made the cuffs a bit deeper than the original:


I think that's everything! As I said earlier, I've worn this coat constantly in this cold weather, and it's kept me warm and toasty. You can throw it on with anything, jeans and a t-shirt or something fancier. I'm actually going to miss wearing it once it gets warm!

See you soon!