Sunday, 22 September 2013

Sewing Fever

I'm just recovering from one of the best weddings EVER, which I attended yesterday. The lovely couple - Heidi Heelz and Johhny Cola - are incredibly cool, as you can see in the photo below:


Of course, a suitably cool outfit was needed for the occasion. For once, I didn't think I would need to make a new ensemble as I have more than enough dresses which have hardly been worn and were glam enough for the big day. Or so I thought...

3 days before the event, I was doing some tidying up around the house, which mostly involved organising my messy stash of fabrics. You know that thing you do, when you wrap a length of fabric around your body and pose in the mirror? (Admit it, I can't be the only one who does this...) When I came across this forgotten gem, that's exactly what I did:


 It's hard to see in the photo, but it's a black stretch velvet, probably polyester, with gold and bronze glitter sprays applied to the surface. I picked it up at Abakhans at least 2 years ago and have looked at it from time to time, but had no idea what to do with it. Until now...

So out went the plan to wear a dress I already had, and suddenly I was pinning and draping and looking through my stash for some firm waistband fabric, a zip, and buttons. I really liked the way it looked when I just held it around my waist, and I wanted to capture that in the finished piece. I'm not vey experienced with knits, and don't own an overlocker/serger, but I figured the stretch qualities of the fabric would mean I wouldn't need as many structural seams and darts and could just fold it and pleat it into the waistband. 

I also had a bit of a Joan Collins, 1980's does the 1940's thing in mind. Cue gratuitous Joan photo:


And here's what I came up with:

I wore: blouse - secondhand, probably 1980's; velvet skirt - made by me; back seamed hold-ups - M&S; shoes - Terry de Havilland


The Autumn light makes it hard to see - the skirt is a long column with just one off-centre seam on the left front, which extends into a draped ruffle-thing (special technical term). So I could walk, and to add some Joan-style sexiness, I left the seam open to the thigh.

Close-up of the ruffle

I placed the zip behind the ruffle, and also added 2 buttons to the waistband, which was some firm cotton drill I had in my stash:


Instead of waistband darts, I just pleated the fabic at each side of the waist:


Was it finished in time? Well... luckily, we were invited to the reception, which started at 5.00, but I was sewing on the buttons and trimming the seams at 12.00!

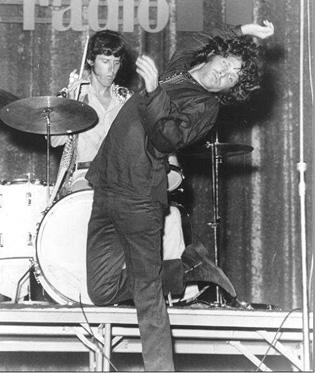
And here are some action shots - I think I'm dancing to Michael Jackson or 'The Look of Love' by ABC:


Needless to say, it was a great evening, with tears of joy and much laughter. Here's to the happy couple!


See you soon!

Tuesday, 10 September 2013

Selfless Sewing - a Hippie Tunic for Mr Needles

I've done lots of sewing over the years for Mr Needles. We both like looks and styles of previous eras, but where I tend towards the 50's and early 60's, he increasingly looks to the late 60's and 70's. This is fine with me - I like those eras as well, they just don't suit me. And I'll happily make him pieces in these styles, like the Psychedelic Vampire shirt I made for him a couple of years ago.

But  he does test my patience by constantly asking for capes, tunics with 'Wizard Sleeves', Kiss or Elvis-style jumpsuits, and bell bottoms of various colours. His most recent obsession has been a hippie tunic, a la Jim Morrison or the alchemist in 'Holy Mountain'.

Jim Morrison
No, that's not Mr Needles waiting for his dinner to be served, but the Alchemist from Jodorowsky's 'Holy Mountain'

He wore me down, so I dug out this pattern from my collection:


(Notice it says 'Small' - I had to do a bit of grading for it to fit Mr Needles 42" chest...)

After a visit to Ridley Rd market for fabric - Indian cotton at the bargainous price £1.20/m - and a quick wash to pre-shrink, I begrudgungly got to sewing. It actually only took a couple of evenings to put together, but like always I got a bit too involved and decided it needed something around the neckline. 

I came up with this silver chain stitch, which was surprisingly satisfying to work, but took a whole day to complete!

Close up of chain stitch

The finished neckline
And here he is in the finished product:


As you can see, he loved it - he apparently 'didn't sweat at all' while wearing it! Such high praise...

In case you were wondering, the backgrounds to these pictures aren't from our home, but an art happening/club night which Mr Needles and friends put on - Super Satanic Saturday! If you like UV-light art, snake dancers, and psychedelic rock, check out their facebook page .


See you soon!

Thursday, 5 September 2013

The Haberdashery and Fabric Shops of Lisbon

I visited Lisbon this time last year, detailed in this post. On our last day I spotted a run of haberdashery and fabric shops while whizzing past on a tram. As it was a Sunday, they were all closed, and we were leaving that afternoon, so I didn't get a chance to visit any of them.

 I just came back from another fantastic visit to Lisbon. Of course there was sun, sea, and great food, but I just couldn't wait to get back to these little shops.


 You know when you build something up in your head, and then when you actually get there it isn't as great as you thought it would be? Well, this is what I experienced with these shops. They were charming and historic, with quirky little drawers of ribbons and boxes of buttons. But I just didn't want anything. It's partly my fault because I didn't have a project in mind. The shops are set up differently to ours - most stock is behind a counter, so you can't browse aimlessly (my preferred method of shopping) and have to ask for everything. 


It also made me appreciate how much choice I have here in London, and that I can find interesting, good quality fabric at pretty low prices. In Lisbon, I found a lovely range of Japanese printed cottons, but they were priced way beyond what I felt they were worth - approx £10/$15 for a half metre. (I assume it was priced by the half metre because it was such a high price)


Maybe I just wasn't in the mood. But the shops were beautiful (these are only a few; there were probably about 7 in one street in the main shopping area) and most importantly they were busy - sewing is obviously alive and well in Lisbon!

Sunday, 1 September 2013

The Lonsdale/Simplicity Tiki Mash-Up


About a year ago I bought this lovely cotton from Abakhans in Manchester. As usual I bought it on impulse without any idea as to what I would do with it, so it sat in the stash for about a year while I did other stuff..

I knew it was destined to be something vaguely Tiki, but my mind was made up when I saw the Hawaiian Sewaholic Lonsdale made by Fiona from Diary of a Chanstitcher


I ordered the pattern straight away! But I wanted to make the skirt a bit more sexy. Then I saw Cassie's Butterick 5880 with the side flounce and got some further inspiration. 


(By the way, go and check out both of these ladies' blogs - they're fab!)

I went off and traced and slashed and taped and measured, until I had what I thought was a pretty reasonable version of the flounce in Cassie's beautiful dress. But what I didn't realise was that this flouncey business takes up a helluva lot of fabric! Everything was laid out meticulously, but there was no way it was all going to fit. Back to the drawing board...

But then the lovely people at Simplicity came to the rescue. They sent me a few patterns to try out, one of which was this:


And view C has a flouncey Tiki-esque look, which takes up much less fabric - Jackpot! 

Enough of this waffling - let's get a look at the finished product! Here it is:


It's hard to see the flouncey bit unless the wind blows:


Here's a close up of the bodice knot detail:


I rarely make a muslin of anything, but I was worried about coverage in the bust area - I'm a bit top heavy - so I muslined it to death, finally settling on cutting a size 12(UK) in the waist, and then expanding to a 16(UK) at the neckline, and it worked out just fine.

I also took Fiona's advice regarding the straps - I just pinned them in place each side of the zip and topstitched through the bodice. Mr Needles helped pin them in place, and ever since he's been referring to himslef as 'Tom Ford':


I also did a lapped split at the back of the skirt. I didn't bother matching any patterns, because quite frankly I didn't really care!

And that's that. It's warm enough here in London at the moment that I can hopefully wear this a lot more; at the very least I can use it as an excuse to drink some tropical cocktails!

See you soon!


Tuesday, 13 August 2013

By Hand London Victoria Blazer - the Control Freak Version

 I know I'm a bit late to the party, but I've just completed a version of the Victoria Blazer, designed by By Hand London. It's my first time using one of their patterns, and I can totally understand why everyone is raving about them - the packaging, the instructions, and all the little details, like the included label, just make this pattern a joy to work with!


I decided to make a punk-inspired version of the longer jacket, along the lines of something these ladies would sport:

Joan Jett, lookin' fierce. (Actually, I'm liking that pink and black combo...)

Nancy Spungen, with Sid Vicious

Early Siouxsie Sioux
And here it is:


I found some great stretch cotton drill in black at Dalston Mill for the body of the jacket, and decided to use some scraps of black satin for the lapels. And to keep it from getting too manly, for the lining I used a cute make-up print poly crepe I found in Walthamstow on a visit with SewAmySew:


 But as indicated in the title of the post, I am a complete control freak when it comes to sewing, so just following the simple instructions was not enough for me! If you follow the instructions to the letter, you would sew the lining to the jacket right sides facing, then turn them both out through an opening which you then sew up. A perfectly reasonable method, but I prefer a more traditional approach - probably why my jacket took longer than everyone else's!

The first change I made was to draft front and back facing pieces, to be cut out of the same fabric as the body of the jacket. I drafted them by basically estimating and drawing them freehand using the jacket pieces. 

Back neck facing (left) and front facing (right)

 These were then reinforced with a medium weight iron on interfacing:

Interfaced facing pieces

I re-drafted the lining, taking in to account the facing pieces. Then I attached the front and back facing pieces, which were then sewn on to the lining:

Facings attached to lining

Facing and lining laid on top of jacket, right side facing, ready to be stitched
My alterations didn't stop here! I added 2" to the length of the jacket to make a hem. I always like some weight to a hem in any garment I make, so I reinforced it with some wide bias strips which I tacked lightly to the inside of the hem. The hem was turned up and lightly slip stitched to the body of the jacket.

Once the lining and facing was attached to the jacket and turned out, I carefully slip stitched the lining to the jacket hem:


'Surely it's done now!' you say. Nope - I also decided to line the sleeves, which I stitched in by hand around the armhole, and again slip stitched at the hem of the sleeve:


Detail of lining sleeve head
And now it's done! And I have to say I'm loving wearing this jacket! It's smart, but still has some edge. I can wear it to work, but also throw it on with jeans and Converse and be totally comfortable.


And one final thing I learned when making this - baking paper makes great tracing paper, and it's really cheap! Sainsbury's has it on offer at the moment - £1.75 for 10 meters.


I'm sneaking off now to look for some fabric for that Joan Jett pink number. 

See you soon!