Monday, 4 November 2013

Halloween Part 2 - Warriors, Come Out to Play-ay...


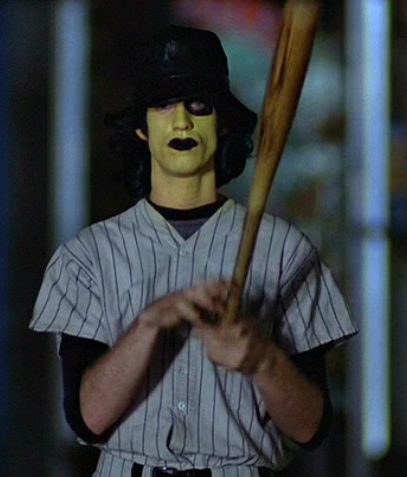
Anyone a fan of 'The Warriors'? For the uninitiated, its a film from 1979 set in New York City. This is New York before Giuliani, before gentrification, before Sex and the City, cosmos, and cool loft apartments. What it had instead is crime, urban decay and lots of hysteria about  street gangs. It's these gangs which the film focuses on, giving them theatrical costumes and names and placing them in a mythical nighttime environment. The story is simple -  the focal gang of the title, the Warriors, find themselves stranded in Manhattan, and have to make their way across the city back to their home turf of Coney Island. Along the way they have to pass through rival gangs' turf, prompting confrontations with some curiously outfitted groups.


Talk to any one who knows this film and the gang they remember is the Baseball Furies. I suppose the outfit is so outlandish, verging on ridiculous, that you just can't forget it; apparently the inspiration came from the directors combined love of baseball and KISS.


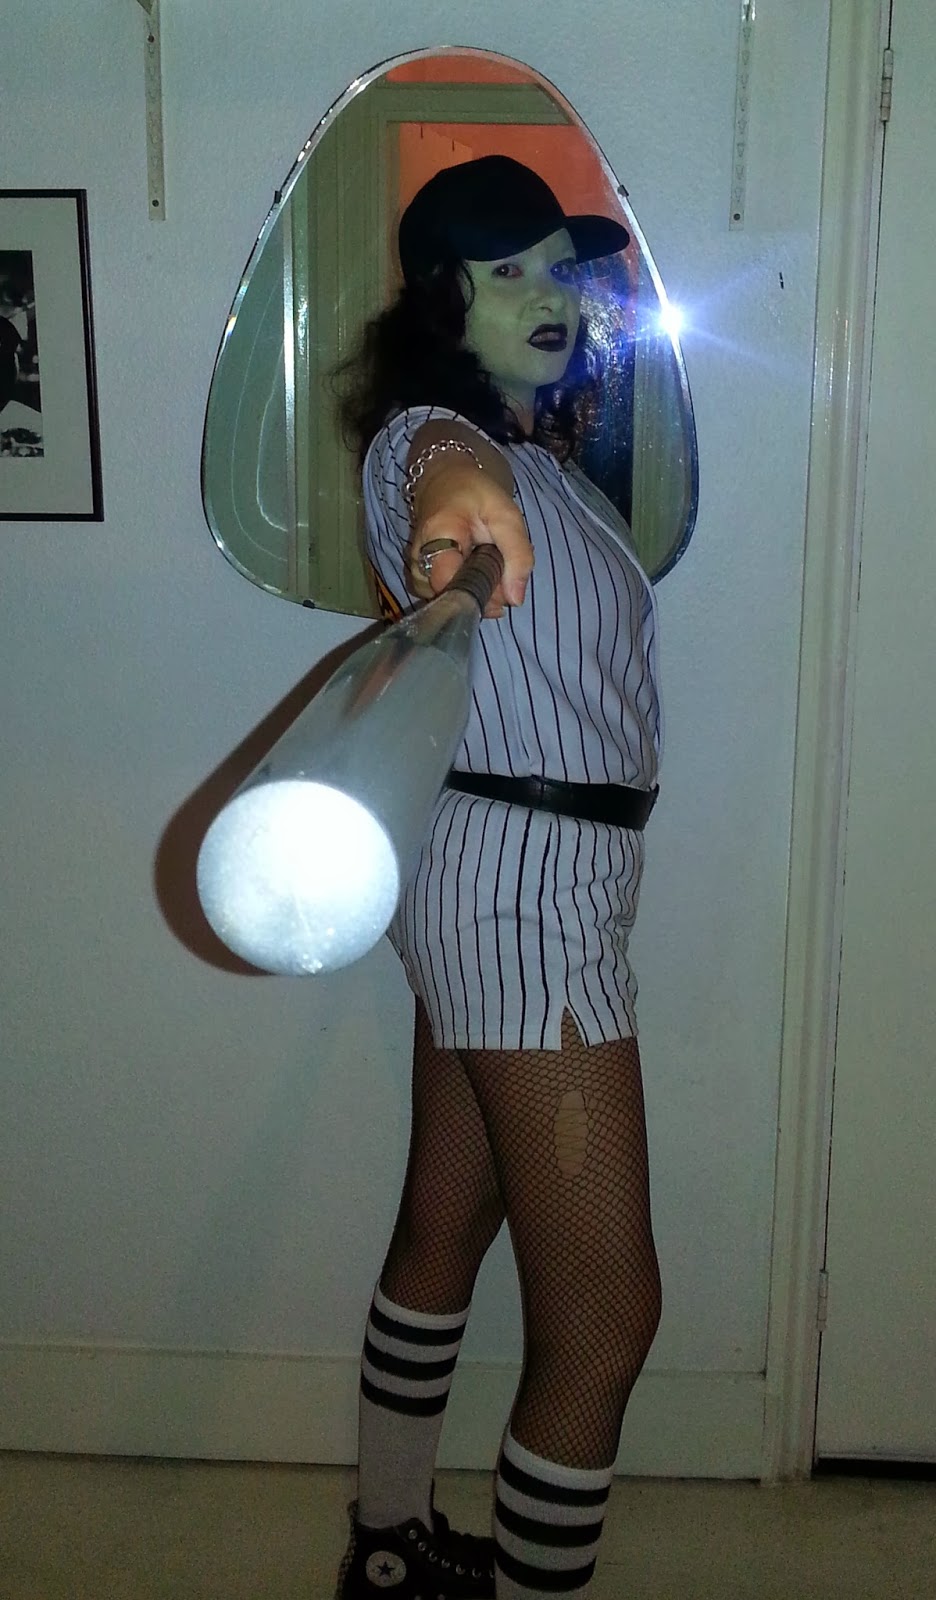
I've always harbored a secret desire I to dress up as a Baseball Fury; this Halloween I decided to go for it! -


I didn't know there was a hole in my tights at the time...I suppose it adds to the look...


As usual, I had to include an element of crafting, which is how the shorts came into being. Take some white jersey shorts from the sale rail at American Apparel, add masking tape and fabric paint - 


- And you have matching Baseball Furies shorts -


Out I ventured into the freezing cold on Saturday night to scare the customers at Super Satanic Saturday


On the door with Honey Manko
- where guests paid tribute to their dead loved ones at our Voodoo altar - 

 Well, Halloween is over, the glitter and greasepaint have been put away, and now it's back to business as usual. Hope you all had a great time, and see you soon!

Wednesday, 30 October 2013

Joining the Minerva Gang!


 I'm very proud to have become part of the Minerva Bloggers Network. For the uninitiated,  Minerva are one of the largest stockists in the UK of fabric, yarn, and all manner of craft supplies. And they've asked lil ol me to showcase some of their fine wares through my humble blog. Once a month, I'll be completing a project made with patterns and supplies from Minerva; if you like it, you can even buy the kit and make it yourself. I'm so honoured!

Of course I'm not the only one - I'll be joining plenty of other talented home sewists such as Rachel Pinheiro, Clare Sew Dixie Lou, and Jo Sew Little Time to name but a few. It's the first time I've done anything like this and I'm really excited and a little bit nervous!

So make your way over to their site, check out the other bloggers, and maybe even scour their wares and make a purchase

Wish me luck and see you soon!

Tuesday, 29 October 2013

Halloween Part 1 - Easy Peasy Japanese-y

I don't know if it's normal, but as the years go by I get more and more excited about Halloween. This year, I've got at least 3 opportunities for costume fun, which suits me fine. And as my wardrobe seems to expand exponentially every year, I have outfits ready and waiting to be dug out and put to spooky work!

It started this weekend with the Danse Macabre, hosted by the Last Tuesday Society at the Coronet in Elephant and Castle over 2 nights. Mr Needles and his cohorts were hosting a room as Super Satanic Saturday, providing a groovy, spooky and rocky soundtrack to revelers.


The Last Tuesday Society - A Danse Macabre


For the Friday night I chose a Biba-esque fortune teller look. This was basically a Christmas outfit from a few years ago, with extra curly hair and black lippy.


For Saturday I resurrected a kimono which I made for Halloween about 10 years ago. In my years of collecting patterns, I managed to pick up this oddity; years later, when my mum gave me some Japanese silk, this pattern seemed like the perfect use for it:


The kimono is reversible,  one side being black twill and satin trim, the other side the purple silk. I love wearing this piece, and have got it out of the wardrobe on occasion and swished around the house in it. But the opportunity to wear it day to day hasn't really presented itself - I'm too worried about the damage I'd do with those sleeves! So it was great to get my geisha on and give it some attention.


Hair was easier than expected - with the help of Google images , backcombing, A LOT of hairspray,and random bits of cocktail implements, you too can look like a traditional Japanese geisha!


I tried the white make up base, but I had a weird reaction to it which made my skin feel like it was on fire, so I just stuck to the traditional red eyeshadow.


The belt is a length of black satin with black cord and curtain tassels sewn to each end to give the effect of a traditional Obi belt.


As you can see I wasn't totally traditional - the outfit was finished off with patterned black fishnets and some really big leopard pants. A girl's got to preserve some mystery!

There were some out of this world costumes over the 2 nights - I'm glad I'm not the only one who gets into Halloween! Here's a random selection of revellers:

Psychotic Clowns

One of the Elektrik Kool Aid Dancers

Ms Heidi Heelz-Cola on the wheels of steel


KISS!


And this was how I felt when it was all over:


Stay tuned for part 2!


Friday, 18 October 2013

Hand Sewn Zips - How-to!

Wherever possible, I put zips in by hand. Why? Machine sewn, lapped zips just never look good to me; I think the stitching looks harsh, especially along the centre the back of a dress. And when you sew a zip in by hand, you can carefully manipulate the fabric to lie flat such as on curves at side seams, something that's hard to do on a machine. I like the individual touch it gives to my projects; its never been my aim to make my clothes look like they're shop bought. Finally, since I tend towards a vintage look in most of my clothes, hand sewn zips fit in perfectly.

Let's start. This is for a lapped zip insertion, which can be used on a dress, skirt, or top  - 

First, we'll be stitching the 'hidden'  or under side of the lapped zipper. Using chalk or something similar that will dust off, mark 5/8"/1.5cm from the raw edge on the right side of the fabric:


Now we'll position the zip. I do this slightly differently to most- place the zip face down on the fabric, positioning the teeth central to the chalk line, with the base of the zip at the base of your opening:


Pin the zip in place:


Now it's time to stitch. I use a small running stitch, close to the teeth of the zip, but not too close. Stitch through all of the layers -


You'll probably find it helps if you wax the sewing threads, because they can get a bit tangled! Once you stitch the length of the zip, fold it right side up:

Right side of zip
See how sewing the zip from the wrong side, then turning it, gives a lovely stitch free edge?  Give it a light press with your iron so that it lies flat, but take care to avoid your zip teeth - you don't want them to melt! You can finish - or not finish - the back however you want:

Wrong side of zip
Next we do what I call the 'top' part of the lapped zipper. Turn under 5/8"/1.5cm on the free side of your opening. I usually press this so it lies flat and is easier to work with. Make sure the zip is closed. Lay your garment flat (or as flat as you can) and place the free edge over the top of the closed zip, so that it covers the zip:


Overlap pinned in place

You can use the chalk line from the previous side as a guide for placing the overlap
Make sure the top edges match, then start stitching. The aim is for your stitching to be as inconspicuous as possible. I use what's often referred to as a 'prick' stitch - you bring the needle up through all the layers, then back through as close as possible to where it came up, leaving just a tiny little dot of a stitch on the surface:


Stitch the full length, through all layers. And that's pretty much it! As I said I use this method most of the time - here are some I made earlier - 


The wrong side of a hand stitched zip - ignore the messy facings!

An Alexander Henry dress from years ago

An tropical dress

The same tropical dress with the zip closed; you can just about see the stitching lines.
And that's how you hand stitch a zip! Next time you have to put a zip in, especially on the side seam of a dress or anywhere that has a difficult or curved seam, I would recommend this technique.

Hope this helps and see you soon!

Wednesday, 9 October 2013

Scrap Happy

I was inspired by Marie's post on fabric scraps to do something with all the little bits and pieces of fabric that I hoard. I haven't the heart to throw them out, but they're usually too small to do anything with, so they build up and take up space in my growing hoard of fabric.

After thinning out the bits that were really too small to use, I was left with some decent sized pieces. But now what? When I made my dustbowl dress recently, I noticed when looking at inspiration pictures from the 1930's that there was a lot of patchwork, either on clothes or to make blankets, covers, etc. 

Migrant worker with patched and mended clothes (Source)
  
Farmer's wife patching her families clothes (Source)
 And I seem to remember that as a child I had a patchwork poncho that I loved, with combinations of cotton and velvet. 

I looked at these books:

  And then made these templates:


I spent ages and ages cutting out, then ironing the seam allowances. Apparently, the prescribed method is to tack them down, but I'm lazy so I skipped this step. So far I have this:


The plan is to make a load of these rosettes, then link them all together with black hexagons and sew them to a backing, maybe with some light wadding/batting in between. And hopefully I'll have a nice blanket for the coming winter months.

I never, EVER thought I'd make a quilt or be interested in them, but there's something so satisfying about using up scraps, playing with the direction of the grain, and slowly seeing it come together. And its a great visual record of all the stuff I've made.

I've decided to sew it together by hand, because I can just pick it up when I feel like it without having to set up the machine and so on. It seemed like a huge task, but once you get going the pieces come together really quickly:

Close up of wrong side with hand stitching
And the best bit about making this quilt - I haven't spent any money so far! The scraps were already here, I'm using thread that I already had, even the templates were made out of shoebox lids and bits of card retrieved from the recycling box. For the backing, I'll probably use some calico that was once part of some curtains I recently replaced. Cost so far = £0.00!

I'm sure it's going to take some time to complete, and I have a number of other sewing projects I have to complete, but I'm hoping it will be done before Christmas. It's going to be a learning process, ie I'll be making it up as I go along, and I'm still not sure how I'll be attaching all the layers together, but wish me luck and I'll keep you posted.

See you soon!