Showing posts with label pencil skirts. Show all posts

Thursday, 25 February 2016

Vintage Pledge 2016 - a Bit of Leopard

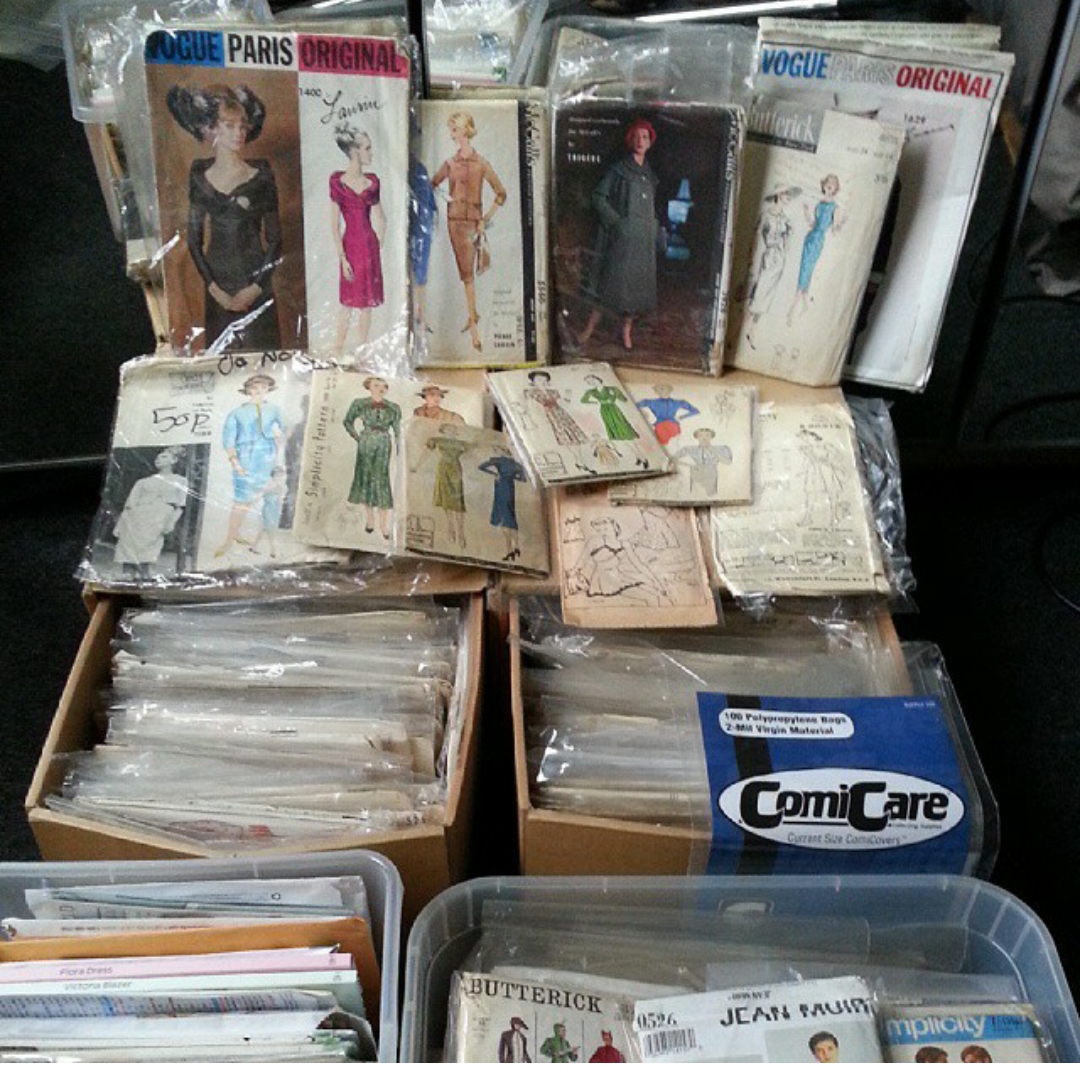
Hello! Once I read about the Vintage Pledge for 2016 on Marie's blog here, I knew I couldn't not get involved. After all, I have more than I know what to do with:


Just a few then...
I decided to start with McCall's 9722, which is a TNT for me. I love the simplicity of the design - it's just one piece and a waistband - and the draping at the waist is flattering and comfortable.


My old leopard skirt was looking the worse for wear, and since I consider leopard a wardrobe basic it was important it was replaced. I spotted this lovely stretch fabric at Fabworks Online:

The skirt fabric is the top right; I went a bit leopard crazy and got the pink jersey for a t-shirt
And here it is:


Picture taking coincided with wash day and my hair being up in a beehive, so Mr Needles decided it would be apt to go full-kitchen sink drama and take some photos while I pegged out the laundry.


The skirt is very easy to make, as it's just a center back seam with a zip and a waistband. I strayed from the vintage path and put in an invisible zip, where normally I would hand pick the zip on a piece like this. But they're still such a novelty to me I want any excuse to use them!


I shortened the length to just past the knee, rather than the vintage mid-calf. The pattern calls for the back vent to be sewn closed, making it in essence a pleat, but I turned it into a lapped split instead. 


And the whole lot was lined with some deep purple poly from my stash:


And that's really it! This is sure to be just the first of many vintage patterns I make up this year. 

See you soon!

Monday, 30 March 2015

Cats with Mustard - Mmmm!

Today you get a 2-for-1 post! I know blog posts have been a bit slow from Needles HQ recently, but it's not for lack of any production, just life getting in the way. Anyway, today I present to you the Disdainful Cats skirt with a hand knitted 1960's tie-neck sweater:


Let's start with the skirt - it's basically the same design as the one I used for my December Minerva project, which involved taking a piece from Burda 122 and sticking it on to the back of a self drafted pencil skirt:

Apologies for creasing...


Close up of back frill
The fabric is a medium weight cotton I picked up at Fancy Silks in Birmingham while on the SewBrum meet-up. It actually came from the furnishing fabrics department - I suppose it's intended for curtains, cushion covers, etc. The cats have a bit of a snooty air about them, so I couldn't imagine having a room decked out in them. Imagine all that judgement gazing down at you. But I liked the colour and feel of the fabric enough to ignore their bullying and make this skirt.


Here's some details-

As with the previous version, I avoided side seams by overlapping the front and back pieces at the side and cutting it all as one, with just a centre back seam. As if by some miracle, the pattern matched up nearly perfectly at the back seam:


Almost perfect matching - take that cats! 

I put in a hand picked zip, and finished off the waistband with a little black button from my stash:


The skirt is fully lined, with the hem finished with bias made from the lining:


Lining where the frill meets the skirt

Detail of the hem
Mr needles was kind enough to be my photographer for the day, but as we started to take the photos an unexpected storm started to build up:


It started raining about 30 mins after this photo was taken!
But it gave me an opportunity to get some action shots of the frill:


Now the sweater-

I love knitting, but I'm less experienced with it as compared to sewing, and I'm often less than pleased with the results. So I stick to socks and scarves, and little things that don't require much fitting. 

But this pattern, from a 1960's 'Woman and Home' booklet caught my eye as something I could actually do well:


I used a 4ply wool and polyester mix by Drops, which I ordered from Loveknitting (It's only £1.50 per ball!) And even though I consider it an 'ugly' colour, I chose mustard because it seemed era-appropriate and I secretly really like it. The only drawback is that the wool is a little itchy, but after washing it seems to be softening up.


The whole jumper is knitted in plain stocking stitch, and other than shaping and a little bit of detail at the hems it was pretty boring to knit. 


Here it is:


I think it's pretty close to the original!


Some details:


Close up of hem
The hem of the body and the sleeves all have this picot stitch worked about 11 rows after casting on. After it's worked, you fold the hem under, resulting in this pretty edging.


Inside view of the hem turned up
Here's a close up of the neck tie:


It's just a long strip with pointed ends that's sewn around the neck and threaded through a little knitted loop on the left.


And that's pretty much it - see you soon!

Thursday, 11 December 2014

Minerva Bloggers Network - Christmas Tartan Skirt

Hello there! Well, winter is definitely here - all my gloves and scarves are out and in use, and the light fades at around 4.00 most days. There's a definite need for warm and woolly clothes. And with Christmas just around the corner, what better choice for a project for this time of year than a tartan woolen skirt. 

I found this brilliant wool fabric from Minerva, which was labelled as a 'coat dress weight'. For a moment I thought it may be too chunky for what I had in mind, but when it arrived I realized it was just right - not too heavy, but just that little bit thicker than your average fabric. I wanted a sort of pencil skirt, but with something different about it. I took inspiration from a lovely flouncy skirt that Ozzy Blackbeard had recently made, as well as the trend in the 40's and 50's for floating panels and swing coats and jackets, where fullness and movement were often at the back of the garment. 

I decided to use my own self drafted pencil skirt for the front half of the skirt, then combined it with this pattern from Burda for the back:

Modell 122 Burda Style 09/2014
I actually took the draped panel from the front of the dress, and shifted it to the back of my skirt.

And this is what I came up with:


I think this is the first time I've ever worked with a tartan or plaid. Whenever I've worked with any kind of repeating pattern like this, I usually find it's all about making choices as to which parts will match and which parts just won't, and how much effort you actually want to put in. As you can see from the picture above, I decided to concentrate on just making sure the horizontal lines were level, but there was no way the colours were going to meet up because of the nature of the tartan.


Centre back seam close up
But one thing I did do to make life easier (or maybe because sometimes I'm just really lazy) was to leave out side seams altogether:

No side seams!
 Because the skirt was straight up and down at the sides with no flare, I was able to overlap the pattern pieces at the side and cut the skirt in one piece. There's just a seam at the centre back and darts at the tops of the sides where the front and back pieces curved. No side seams meant I was able to cut down on the amount of pattern matching I had to do - yay!

I also decided to match the waistband where I could at the centre front. What the pattern decided to do after that I left up to fate!:


Centre front waist band
The fabric is pretty soft, not too itchy, but I lined it to avoid any of that scratchiness:


And that's my Christmas tartan skirt, which I think will be perfect for Christmas day. I've already practised eating in it, and can report it can handle quite large amounts of food, so all's good there! 


See you soon!

Thursday, 21 August 2014

Cheers! The Champagne Skirt by Capital Chic


A short while ago, Sally from Charity Shop Chic launched a collection of patterns under her label Capital Chic. If you follow Sally's blog, you'll know that she's all about re-creating high fashion, sophisticated looks on a budget, and this ethos is carried through into her pattern collection. These are minimal, grown-up pieces which would work well in the office, or take you through to drinks in the evening.

I'm lucky enough to know Sally, and she was kind enough to offer me a free download to try out. I jumped at the chance to try out the Champagne Skirt:


Sally in the Champagne skirt - she does all her own modelling!

It's a pencil skirt, and it has frills - what isn't there to like!? I decided this would be a perfect work skirt for me.

Out came the scissors and tape - all of Capital Chic's patterns are PDF downloads - and I quickly put it all together. I've only ever used 1 PDF pattern before, and the download of that didn't go well (wrong size, etc), but this was a breeze. Sally has obviously put loads of work into making sure the assembly of the pattern is as pain-free as possible. There are lots of little numbers and letters in strategic places to help you match everything up, and nice clear cutting diagrams.

Enough of my waffling - here's my version:


I'm much more curvaceous than Sally, so the skirt is more figure hugging than in the website photo. I used a stretch sateen, meaning it could be tight without being uncomfortable, and lined it with a rose polyester. This is a size 14, which works well, though the wrinkles across the front are bothering me - either I need to add a bit of room across the hips in future versions, or I've just forgotten how to stand! Also, this fabric does tend to show every wrinkle, despite being black.


Back view
It's a pretty straight forward project, and only really took about a day of sewing to complete (probably less if you don't get distracted easily like I do). The instructions are clear, with excellent diagrams - check out this iron!:


Sally explains all the steps clearly and simply - I think a beginner could follow them easily - but of course I went rogue and used some of my own techniques. First,before I attached the frill to the skirt, I stitched it to it's lining, right sides facing. After trimming and clipping the seam I then turned the pieces right side out and under stitched the seam allowance towards the inside to give the hem a crisp finish. 

That probably sounds like gobbledygook, so here's a picture to help you understand:


The finished frill, with seam allowance under stitched to the inside. 
Then I attached the frill to the skirt, sandwiched between the lining and the body of the skirt; this seam was also under stitched.


I've worn this skirt to work several times already, and even had a few complements on it - this is definitely one I'd make again. Well done, Sally!


But don't just take my word for it - visit Capital Chic for yourself!